Saturday, November 30, 2013

Fall Gradient

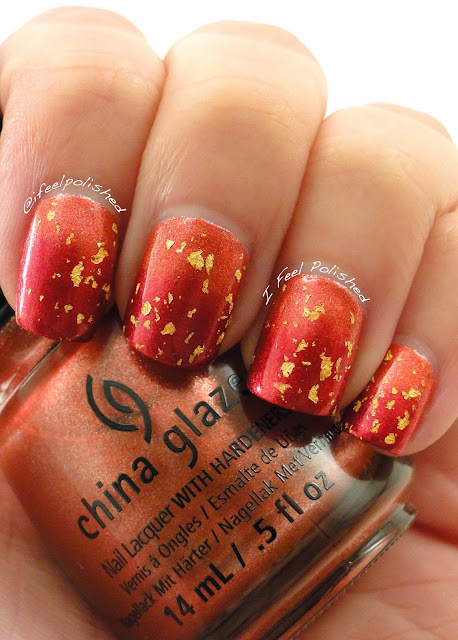
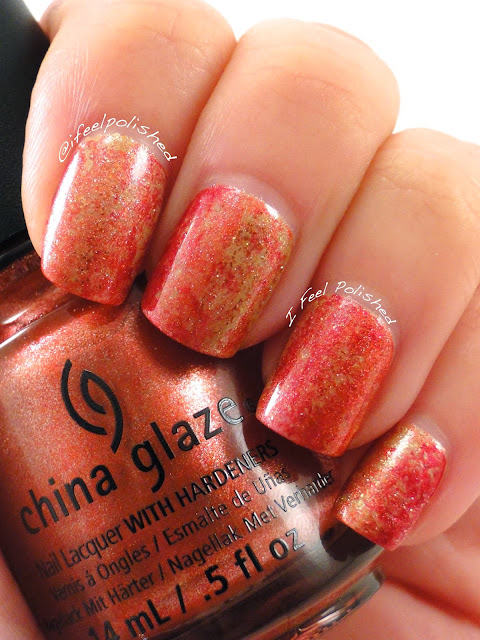
Oh, Fall! How I'll miss thee! I just love the colors associated with Fall and I've had a great time using them to create nail art! But, I have to finish them up now because Winter is Coming! ;) I'm finishing up my Fall nail art with a sponged gradient!

I began with two coats of China Glaze Elfin' Around, a coral polish that leans reddish-orange. I used tiny pieces of ripped up make-up sponge to dab China Glaze Just Be-Claws over the tips and up toward the middle of my nail. I ended up with a very subtle but pretty gradient! I finished it up with one coat of Zoya Gilty, their 18K gold top coat. Happy Fall! Enjoy! :) 

Fall Nail Art

Fall Nails

Autumn Nail Art

Autumn Nails

Thursday, November 28, 2013

Happy Thanksgiving!

Happy Thanksgiving to my American fans who are celebrating today! I hope you have a wonderful day with your family and friends! This is my first Thanksgiving home in five years and I'm so excited! I've missed the food soooo much! Oh, and my family, of course!

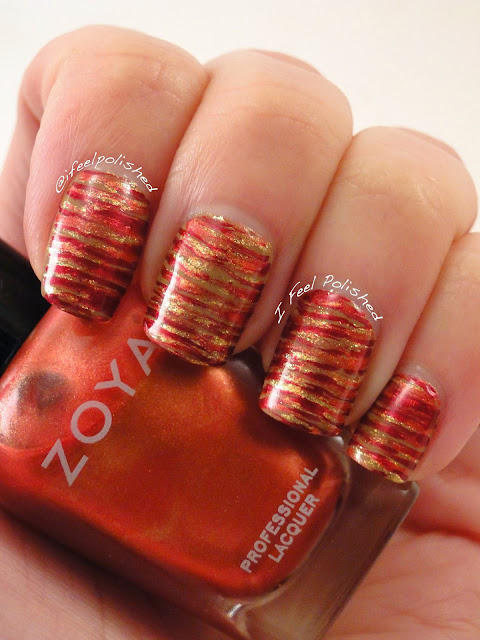
To celebrate today, I did some fan brush nail art! I always forget how much I love using a fan brush! It is so simple and gorgeous and easy to do on my right hand, too! I began with a base of Zoya Flynn. Then, I used Zoya Isla, Kerry, and Channing for the fan brush effect. I love these so much! Enjoy! :) 

Fan Brush Nail Art

Fall Nail Art

Thanksgiving Nail Art

Fall Nails

Wednesday, November 27, 2013

Happy Hanukkah and a Top Coat Comparison!

Happy 1st Day of Hanukkah to anyone beginning their celebrations this evening! Last year I wished I had done more with other winter holidays besides Christmas, so today I have some Hanukkah nails for you! 

For these blue, starry nails, I began with two coats of ellagee's The Hottest Spot North of Havana. Once that was dry, I sponged ellagee's Rainbows All Over Your Blues, Zoya Song, and Zoya Dream over it using tiny pieces of a ripped up make-up sponge. I finished it off with one coat of ellagee Designated Driver! 

Also, I've been dying to compare top coats for awhile, so when ellagee created her own quick-dry top coat, I decided I better get on my comparison! So, I used Poshé on my index finger, HK Girl on my middle finger, ellagee's new Glass top coat on my ring finger, and Gelous on my pinkie. Here's what I have to say about each one:

Poshé-Dry to the touch in 45 seconds, dry to rough touch in 60 seconds, smoothed this glitter in one coat, retails for $6.99

HK Girl-Dry to the touch in 30 seconds, dry to rough touch in 60 seconds, smoothed this glitter in one coat, retails for $6.95

Glass-Dry to the touch in 45 seconds, dry to rough touch in 60 seconds, smoothed this glitter in one coat, will retail for $6.50

Gelous-Dry to the touch in 4 minutes, dry to rough touch in 15 minutes, would have needed a second coat to smooth the glitter, retails for $5.99

I also wore my Hanukkah nails for three days to test durability, and I have to say that I'm pleased (see final pictures)! My nails looked fabulous after three days with all of the top coats! I plan to do a longer test in the near future. Gelous isn't meant to be quick dry, but it sure did put a cramp in my after polish activities! The other three were fast to dry and their durability makes me so happy! :)

The best news? If you purchase $15 from ellagee between Black Friday and Cyber Monday, you'll get Glass for free! Of course, you'll be able to purchase it as well if you aren't at that $15 limit! I highly recommend giving it a try! For the dry time, durability, and price, you just can't beat it! I've been using it like crazy over the past month to test wearability and it hasn't disappointed me at all! It's my new, go-to quick dry top coat of awesome! Enjoy! :)


Hanukkah Nails

Hanukkah Nail Art

Chanukkah Nails

After three days of wear:

Top Coat Comparison

Top Coat Comparison
Tip wear-just a slight amount on the edge of my nails and the corners! Pretty good!

Tuesday, November 26, 2013

Indie Spotlight: Shimmer Carmen

Hello, my name is Heather and I'm a glitter addict. Luckily, I have a feeling I'm in pretty good company here! :) Shimmer is the queen of glitter bomb awesomeness and she definitely helps to satisfy my addiction with her glittery concoctions! 

Carmen is a copper gold explosion of glitter, which seems fitting for this time of year! I just love this polish! I ended up doing three coats all by itself with one coat of an extra amazing top coat by ellagee that smoothed this glitter bomb right out! Enjoy! :)

Shimmer Carmen

Shimmer Carmen

Shimmer Carmen

Shimmer Carmen

Monday, November 25, 2013

Twelve Days of ellagee: Ev'ryone Wishes For Silver and Gold

Day Two in the Twelve Days of ellagee countdown: Ev'ryone Wishes for Silver and Gold. Oh my gosh, I am so in love with this polish! Laura needed a twelfth polish to make her collection work as a multiple of three (don't ask, we're weird, lol!) so I helped her come up with this beauty. And boy, is she a beauty! This polish is flawless and pretty much everything I love about polish wrapped up together! And it's inspired by the Burl Ives song featured in Rudolph the Red-Nosed Reindeer! I just love those claymation movies!

Ok, first off, this is an ivory jelly base. Second, it's chock full of circle glitter (CIRCLE GLITTER!). Third, the glitter is holographic! Do you need more? NOPE! Ev'ryone Wishes For Silver and Gold is full of silver and gold glitter in a variety of shapes and sizes and because it's in an ivory jelly base, it naturally turns into a jelly sandwich all on its own! That's right! This beauty is $9 and worth every single penny. I did three coats all by itself but you could always use undies for quicker opacity! Enjoy! :)

ellagee Ev'ryone Wishes for Silver and Gold

ellagee Ev'ryone Wishes for Silver and Gold

ellagee Ev'ryone Wishes for Silver and Gold

ellagee Ev'ryone Wishes for Silver and Gold

Saturday, November 23, 2013

Doctor Who's 50th Anniversary Nails!

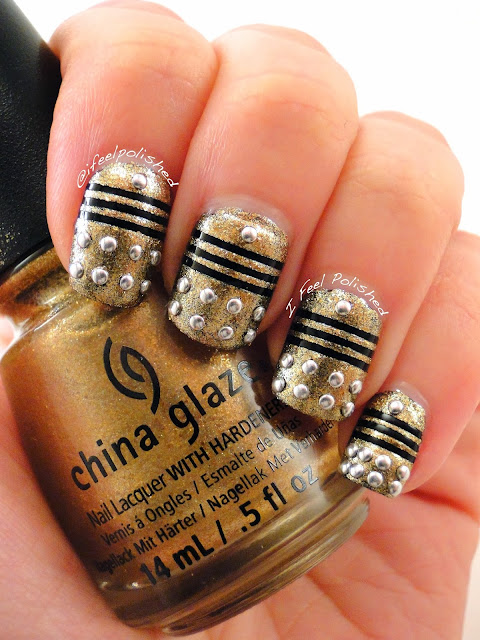
If you've been following me for awhile, you know that I'm a major Whovian! I LOOOOOOOVE Doctor Who! Well, the 50th Anniversary episode is today! So, of course, I had to do some Doctor Who inspired nail art! :)

Even though they're the bad guys, Daleks just work with the natural shape of a nail! So, I'm rocking some Daleks for the 50th Anniversary today! And I just love how they turned out!

I began with two coats of China Glaze Liquid Leather. Once that was dry, I put three horizontal stripes with string tape across the top part of my nail. I then polished over the tape with China Glaze Mingle with Kringle and pulled the tape off right away. I finished them up with some silver stud accents and top coat! I love them! Enjoy! :)


Doctor Who Nails

Doctor Who Nail Art

Dalek Nails

Thursday, November 21, 2013

Catching Fire Nails!!

Today's Indie Spotlight will post next Tuesday because I HAD to post these today! Why? Because Catching Fire comes out at midnight! Eeeeek! And while I won't be able to go see it at midnight, I can pay homage to it and wear this polish when I go see it over the weekend! :)

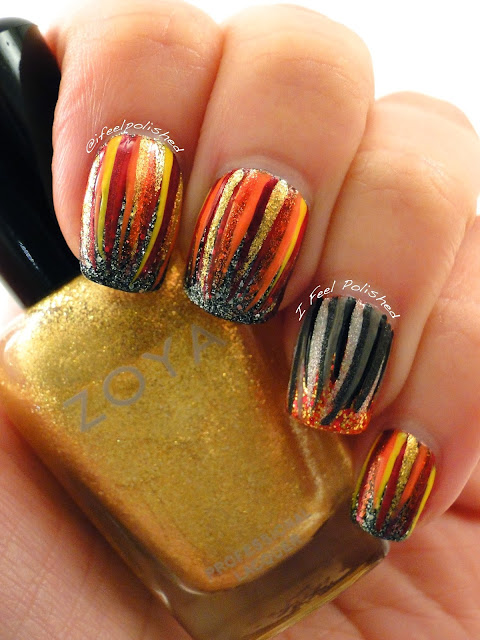
I absolutely love The Hunger Games books! Of course, I love the first movie too, even though it isn't nearly as good as the book. Are movies ever as good as the books? :) Anyway, I decided to do some fire inspired nails for the release of Catching Fire! I can't wait to see it! Ahhhhhh!

I began with two coats of OPI How's It Snowin'? on every nail except my ring finger (and thumb, which you can't see). On my accent nail, I polished two coats of China Glaze Riveting followed by one coat of China Glaze Electrify. Once my nails were dry and sufficiently sparkly, I used the waterfall technique created by The Nailasaurus! I used Zoya Raven, Zoya Seraphina, China Glaze Recycle, and China Glaze Stone Cold on my accent nail. I used Zoya Sooki, Zoya Thandie, Zoya Darcy, Zoya Kerry, Zoya Isla, and China Glaze Riveting on the rest of my nails! I love how they turned out and they sure as heck beat my Hunger Games nails when I first began my blog, hahaha! So funny to see how much my skills have changed! Enjoy! :) 

Hunger Games Nails

Catching Fire Nails

Hunger Games Nail Art

Tuesday, November 19, 2013

Fall Plastic Wrap Nails

I have been obsessed with Fall nails lately, if you couldn't tell! Fall is my favorite season and it's mainly for the colors! Reds, oranges, golds, ahhhhhhh! I can't do enough nail art with those color combinations! It has become an obsession and my nail polish desk has been constantly stashed with a variety of Fall colors! :)

Today I decided to do some plastic wrap nail art using Fall colors. Remember, I did a tutorial on plastic wrap nails a few months ago! I challenged myself with this one though because I decided to use three colors as the top coat, not the traditional one color! 

I began with two coats of Square Hue Blond Ale as a base. Then, I polished three vertical stripes of China Glaze Elfin' Around, Just Be-Claws, and Mingle with Kringle and quickly used the crumpled up plastic wrap to distress the polish! I love the subtle effect! These nails turned out so well! I'm really pleased! Enjoy! :)

Fall Nails

Fall Nail Art

Plastic Wrap Nail Art

Plastic Wrap Nails

Monday, November 18, 2013

Indie Spotlight: You Polish Mickey and Minnie

I know Mickey and Minnie glitter has been blowing up like crazy lately, but some of the combinations I've seen have just been so blah. It's very easy to tell when someone just threw them into a polish just to list them and when someone actually took the time to consider amazing combinations. You want amazing combinations? Enter Mouse in the House Collection!

Lauren is so creative with her glitter combinations! I cannot recommend her polishes enough! I can tell that Lauren really thought about amazing combinations for her mouse glitters! The best news? Lauren is restocking these babies today! They are $8 each!

Mickey and Minnie in Love is full of holographic dust, silver holo dots and hearts, white hexes and squares, pink hexes, and Mickey heads in pink, red, and silver! WOW! I decided to polish Minnie and Mickey in Love over black because I wanted all of the colors of the glitters to pop! I did one heavy coat and I only had to fish once because I really wanted a silver Mickey and kept getting reds and pinks naturally! Hahaha! 

You Polish Mickey and Minnie in Love

You Polish Mickey and Minnie in Love

You Polish Mickey and Minnie in Love

You Polish Mickey and Minnie in Love

Next up is We've Got Ears! This glitter topper has yellow, black, and white dots, hexes, and squares along with red Mickey heads! I love the mix of matte glitter in this top coat! I did one coat over grey! And no fishing required! :)

You Polish We've Got Ears!

You Polish We've Got Ears!

You Polish We've Got Ears!

You Polish We've Got Ears!

Last but not least, my favorite, When He Makes Me Laugh! I can't stop thinking about this polish! I want to wear it again right NOW! I just love it! When He Makes Me Laugh has black Mickey heads and a variety of matte pink and white glitter! So gorgeous! I did one coat over silver and it looked so great with the shimmery silver polish and the matte glitter! I LOVE IT! Enjoy! :)
You Polish When He Makes Me Laugh

You Polish When He Makes Me Laugh

You Polish When He Makes Me Laugh

You Polish When He Makes Me Laugh

Saturday, November 16, 2013

Fall Nail Tutorial

Remember my Native American inspired nails? Well, someone on asked for a tutorial, and even though it has taken me some time, here it is! I love this design even more after doing it a second time! Since this is a tutorial, it is picture heavy! 

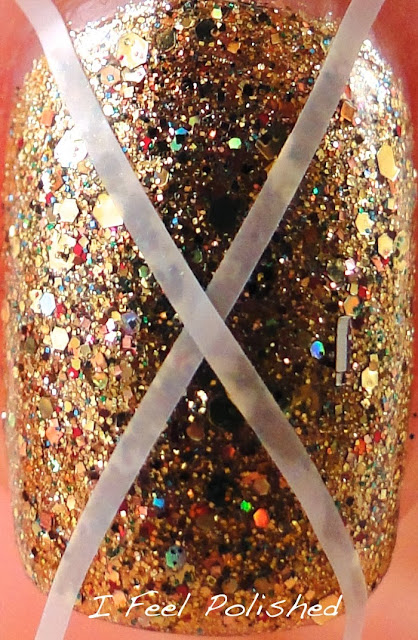
Begin with your base color. I chose to go with a gorgeous gold glitter, Shimmer Tracy. I did one coat over China Glaze Mingle with Kringle:

Shimmer Polish Tracy

Shimmer Polish Tracy

Shimmer Polish Tracy

Shimmer Polish Tracy

Then, when Tracy was dry, I taped my nails off so it looked like a big "X" on my nails:

Striping Tape Tutorial

Striping Tape Nails

Then, I put down lines that were parallel to the lower part of the "X" if that makes sense. Like this:

Striping Tape Nail Art


Striping Tape Manicure

Next, I polished Zoya Thandie, an orange creme, over the tape in one coat that was slightly thicker, to increase opacity as much as possible with one coat:

Fall Nails

Remember, pull the tape off quickly! DO NOT wait for the polish to dry! Finally, I added dots of China Glaze Just Be-Claws, a beautiful red foil, with my dotting tool. I dotted between the parallel lines on all of my nails and then I also dotted in the top and bottom triangles on my accent nail! I hope this was helpful! Enjoy! :)
Fall Nail Art

Thanksgiving Nails

Thanksgiving Manicure
Newer Posts Older Posts Home