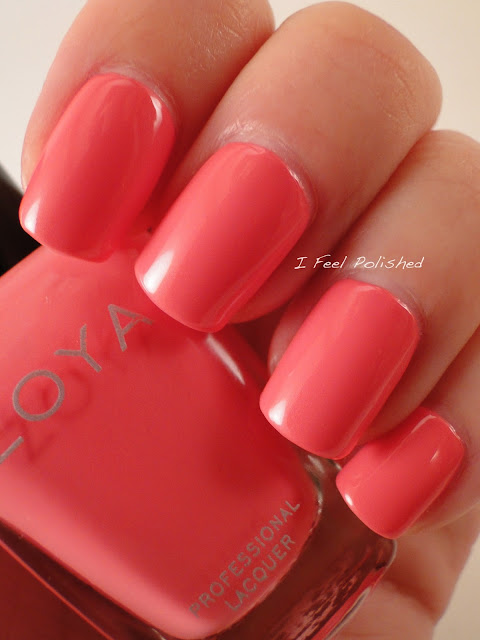
Thursday, May 30, 2013

Indie Spotlight: ellagee World of Laughter

I am really in love with ellagee. Every single polish by Laura makes me want to just turn my paycheck over to her! :) The formula is flawless and her unique polishes are wonderful additions to my huge collection. When an indie maker can make a polish that is unique to my collection, that is saying a lot! Laura sent me three polishes from her new Disney-inspired collection, World of Laughter, to show to you today. Enjoy! :)

Harambe: Named after the Wildlife Reserve at Animal Kingdom, this polish is a cream base with tons of glitter in a variety of colors: red, orange, yellow, green, gold, and brown. This is two coats of Harambe. 

ellagee Harambe

ellagee Harambe

ellagee Harambe

We Wants the Redhead!: Named after the redhead in the auction scene during the Pirates of the Caribbean Ride, this red/copper jelly base is packed with red, bronze, rust, copper, and gold glitters! This is two coats of We Wants the Redhead. The final photograph has one coat of matte top coat on it.    

ellagee We Wants the Redhead!

ellagee We Wants the Redhead!

ellagee We Wants the Redhead!

ellagee We Wants the Redhead! matte

My favorite, Grand and Miraculous Spaceship: Named for sky in Epcot's Spaceship Earth ride, this purple to blue to turquoise multichrome polish also boasts little silver and iridescent glitters. The multichrome is SO HARD to photograph! I just love this polish and couldn't capture it as perfectly as I wanted to. I promise, this polish is ten times more amazing in person! This is two coats of Grand and Miraculous Spaceship.

ellagee Grand and Miraculous Spaceship

ellagee Grand and Miraculous Spaceship

ellagee Grand and Miraculous Spaceship

ellagee Grand and Miraculous Spaceship

Tuesday, May 28, 2013

Holographic Nail Art

With the perpetual sunniness of summer finally upon most of us, I knew I had to break out in some holographic polish! I wanted something fun, so I decided to attempt a geometric angular french-ish tip type nail. Hahaha, definitive name, right?! Anyways, I began with two coats of Zoya Purity. Then, I taped a diagonal line across the lower half of my nail. I then taped two other lines, creating three total triangles. I used Color Club Miss Bliss, Eternal Beauty, and Over the Moon to polish in the triangles before pulling off the tape. Enjoy! :)

Color Club Halo Hues

Color Club Miss Bliss

Color Club Eternal Beauty

Color Club Over the Moon

Saturday, May 25, 2013

Pixie Dust Chevrons

Hello! I have some fun nail art today that earned me TONS of compliments! And it's pretty easy to create using just tape! I began with two coats of Zoya Yaya:

Zoya Yana

Zoya Yana

Zoya Yana

I then used striping tape and taped two chevron stripes on each nail with the exception of my accent nail. For that nail, I used scotch tape to create a larger stripe between the two striping tape chevrons. I then polishes one thicker coat of Zoya Solange (PIXIE!!) over Yana. I pulled the tape off immediately and BAM! Done! Enjoy! :)

Chevron Nails

Chevron Nail Art

Pixie Dust Nail Art

*These polishes were sent by Zoya. My opinions and art are my own!*

Thursday, May 23, 2013

Indie Spotlight: Peanut Butter and Jelly

Today I have a polish by ! This beauty is called Peanut Butter and Jelly and it is simply amazing! It's a dark maroon base with fine and larger gold glitter. I did two coats of PB&J over one coat of Zoya Jem, which I think darkened the original color of PBJ a bit. I plan to use it again soon, without undies! :) Peanut Butter and Jelly went on so smoothly. Pam really does a fantastic job with her polishes and I highly recommend them! Enjoy! :)

Whimsical Ideas by Pam Peanut Butter and Jelly

Whimsical Ideas by Pam Peanut Butter and Jelly

Whimsical Ideas by Pam Peanut Butter and Jelly

Tuesday, May 21, 2013

Hand Perfection Review

is a set of three products developed by hand model Ellen Sirot. When I was asked to review them, I was really excited because I am obsessed with hand products! The products in this set included a nourishing day cream, rejuvenating night cream, and a nail and cuticle pen. These three products are said to give you younger looking hands in five days but it is recommended that you use them for two weeks to see the best results. Now, I'm pretty young so I didn't notice that my hands looked significantly younger after two weeks. However, I noticed a huge change in the health of my cuticles and nails. They looked a lot better, in addition to feeling stronger. The best thing about these products is how easy they are to use. The day cream is in an easy to carry squeeze bottle, the night cream is in a little pot, and the cuticle and nail oil is in a pen. These products are available at Walgreens for $14.99 for each cream and $9.99 for the cuticle pen, as well as on their website

Both creams have a good consistency. They are thick, but not greasy. They soak in quickly and leave your hands feeling wonderful. The day cream is on the left and the night cream is on the right. My only complaint with the cream is that I constantly wash my hands and then immediately put on lotion, so at the end of the two weeks, my day lotion was gone. I wish it would have lasted longer. BUT the average person who doesn't wash their hands a billion times a day won't have that issue! :)

Hand Perfection

Hand Perfection

The nail and cuticle pen has a soft end and a button on the bottom that you push to click the product up the pen. My only complaint about this is that when I'm all oiled up and trying to put the lid back on, I can't push the bottom down against the table to snap the lid in place. Minor issue that I was able to work with easily. I found that the oil wasn't nearly as oily as other products I have used. It stayed in place and soaked in quickly.

Hand Perfection

Hand Perfection

Hand Perfection Review

After 10 minutes:

Hand Perfection Review

                                      BEFORE                                              AFTER
*My ring helped me tell the difference between pictures :)

Hand Perfection ReviewHand Perfection Review

                                        BEFORE                                             AFTER

Hand Perfection ReviewHand Perfection Review

Saturday, May 18, 2013

Tie Dye Nails

For lack of a better name for these, I decided upon Tie Dye Nails. :) These are really, REALLY easy! I began with two coats of Zoya Micky. Micky is my absolute favorite polish from the Stunning Collection! It's so watermelon-y and juicy! I just love her!

Zoya Micky

Zoya Micky

I then used Zoya Josie, also from the Stunning Collection, and a thin nail art brush I bought off of Amazon to create a messy section of polish in the center of my nail:

Zoya Josie

Using the same thin brush, I used Zoya Rocky to polish from a little below where I began Josie down to the tip of my nail. Next time, I'll probably start with a lighter base, with a medium color in the middle and a darker color on the bottom for more of a defined distinction between all of the colors. Enjoy! :)

Zoya Rocky

Tie Dye Nails

Easy Nail Art

*The Stunning Collection was sent for me to review. That does not change my own opinions!*

Thursday, May 16, 2013

Indie Spotlight: Shimmer Round 2

Don't forget to enter my giveaway!

I just adore full coverage glitter polishes! She is just soooo good at creating these polishes without making them feel gross and clumpy. And, it doesn't hurt that she's super nice! I have five beauties to show you today that Cindy Shimmer sent me to review! These all show three coats except Alessandra, which I did two coats of over one coat of Zoya Isla. Enjoy! :) 

Alessandra
Shimmer Alessandra

Shimmer Alessandra

Shimmer Alessandra

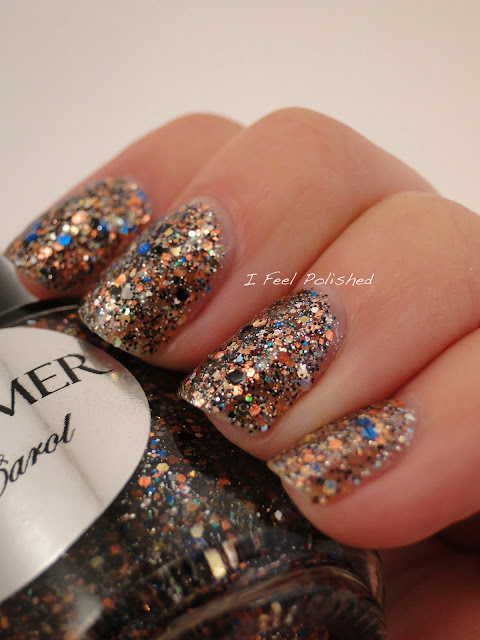
Carol
Shimmer Carol

Shimmer Carol

Shimmer Carol

Elsa
Shimmer Elsa

Shimmer Elsa

Shimmer Elsa

Shimmer Elsa

Jasmine
Shimmer Jasmine

Shimmer Jasmine

Shimmer Jasmine

Shimmer Jasmine

Melissa
Shimmer Melissa

Shimmer Melissa

Shimmer Melissa

Shimmer Melissa
Newer Posts Older Posts Home