Thursday, November 29, 2012

Indie Spotlight: Out of Space Convertible

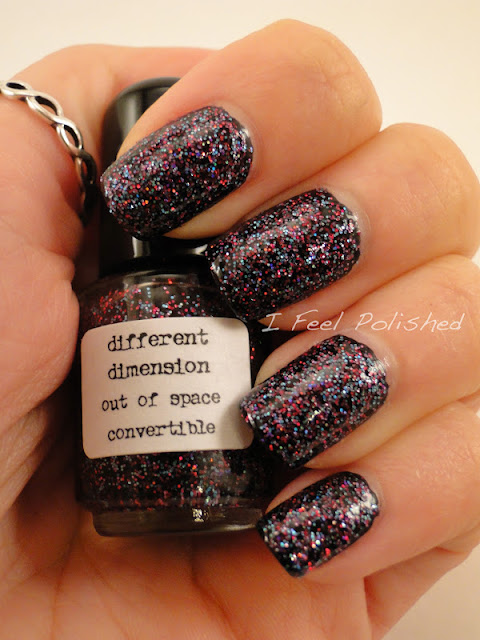
The indie spotlight today is another beauty from ! This one is called Out of Space Convertible and it's from the Santa Baby Christmas Collection. This polish is a black jelly with pink, blue, and purple micro holographic glitters. I polished it over Zoya Raven but it is opaque on its own after three coats. This is a gorgeous polish with a smooth application! And it isn't specific to Christmas, so you can wear it for more often than one month per year! Definitely check out the -->Santa Baby Collection --> if you haven't already! Enjoy! :) 


Different Dimension Out of Space Convertible

Different Dimension Out of Space Convertible

Different Dimension Out of Space Convertible

*This polish was sent for review. As always, the opinions are my own. 

Tuesday, November 27, 2012

Brown and Gold Gradient

A friend of mine loves neutral polishes and recently purchased Essie's Little Brown Dress. After polishing her nails with it and Zoya Gilty (gorgeous, by the way!), I had to try it with Zoya Ziv! After taking her polish from her :), I started with two coats of LBD, which is a gorgeous dark brown creme:

Essie Little Brown Dress

Essie Little Brown Dress

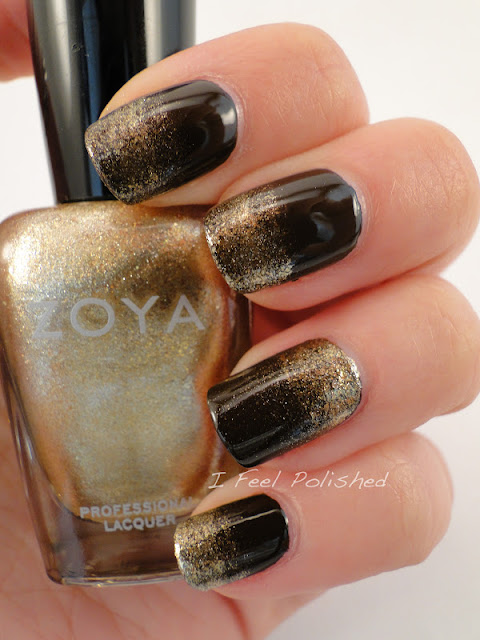
After that, I used Zoya Ziv and a makeup sponge to create a gradient. These two are perfect together! What an awesome holiday mani! Enjoy! :) 

Brown and Gold Gradient

Zoya Ziv

*Zoya Ziv was sent for review. All opinions are my own, as always. 

Saturday, November 24, 2012

Magnetic Mani

A co-worker was recently showing off her magnetic polish manicure at work and it rekindled my love of magnetic polish! I bought the whole China Glaze Magnetix collection when it came out around February last year and I've only used one of the polishes for a whole mani, having only swatched the others! That was back when I was just a baby polish lover and not even a blogger yet! I loved the polish but struggled with the application a little bit. Apparently, time was all I needed because when I whipped out You Move Me, it worked perfectly! I got tons of compliments and this mani was almost no work at all! I so rarely use just one polish at a time on my nails anymore that I almost didn't know what to do with myself! 

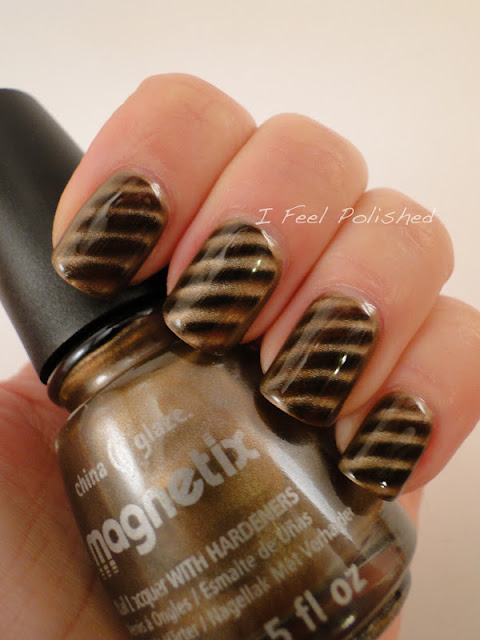
You Move Me is a soft brown polish and it even had some reddish hues after the magnet was applied! The magnet brings out a black color in the polish. I chose to use the striped magnet, but there is also a starburst shape and chevron shape on the u-shaped magnet as well. I polished my nail with two coats of You Move Me. On the second coat, I held the magnet over my nail for about 30 seconds. Then, I moved on to the next nail. I found the the longer I held the magnet over my nail, the stronger the magnetic design was. My only complaint is that the magnet isn't strong enough to pull the design from the sides of your nail, too. A curved magnet would be awesome to contour to the shape of a nail! :) Anyways, the finished mani had a cool tiger's eye, three-dimensional look to it! I dragged the polish a little while applying top coat but I was in a rush. Next time, I'd wait longer before applying my top coat. Enjoy! :)

China Glaze You Move Me

China Glaze You Move Me

China Glaze You Move Me

China Glaze You Move Me

China Glaze You Move Me

Thursday, November 22, 2012

Indie Spotlight: Way Existential

First of all, HAPPY THANKSGIVING to my ! I hope each of you is spending a wonderful day with those you love! :)

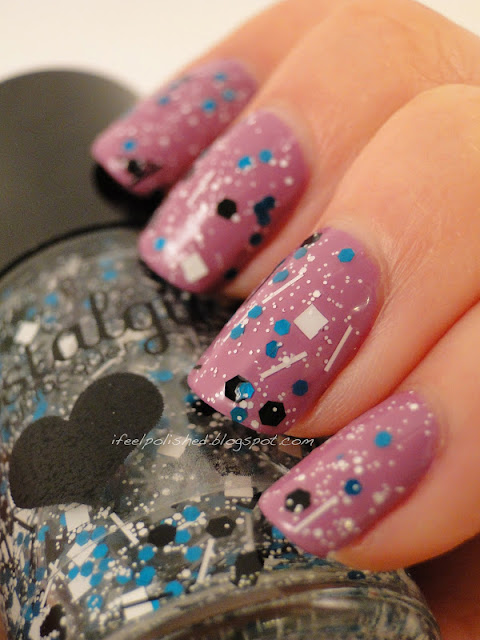
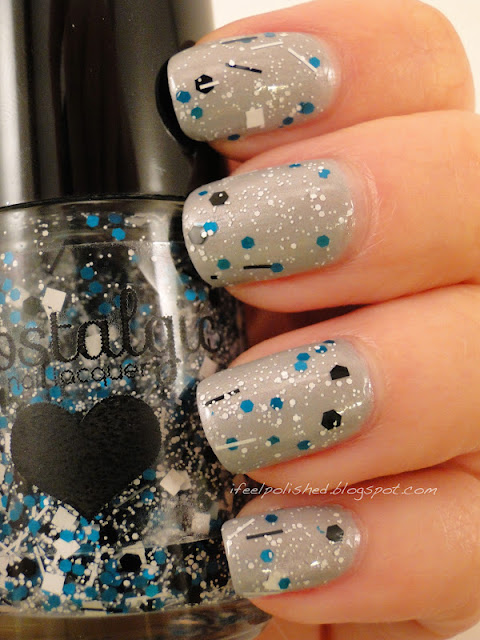
For the Indie Spotlight today, I have another beauty from Nostalgic Nail Lacquer today! This is one amazing polish! It's called Way Existential and it's a clear base with black, white, and teal matte glitter. There was some bar glitter, which I usually hate, but this polish made me rethink my hate because they really make the polish! There are also square, hex, and micro glitters in this amazing polish. I tested it over several colors and it looked great on so many, I had a hard time choosing! I finally ended up putting it over Zoya Perrie and Zoya Harley. Enjoy! :)

Nostalgic Nail Lacquer Way Existential

Nostalgic Nail Lacquer Way Existential

Nostalgic Nail Lacquer Way Existential

Nostalgic Nail Lacquer Way Existential

Nostalgic Nail Lacquer Way Existential

Nostalgic Nail Lacquer Way Existential

Nostalgic Nail Lacquer Way Existential

*This polish was sent for review. All opinions are my own, as always.

Tuesday, November 20, 2012

Nail Repair

There isn't a mani on the blog today but don't be sad! Today is dedicated to a helpful hint I recently had to use! I always use a strengthening base coat before I polish my nails. Generally, they're really strong but every once in a while, they break. And then I cry. :) I usually don't mind trimming them short because I have pretty long nail beds so they still look long. However, I recently suffered my first break since beginning my blog! This break was going to be a bad one because I wouldn't have been able to fix my nail shape without cutting my nail painfully short. Even then, it would have looked odd. 

Having heard bits and pieces of information about using tea bags to repair nails, I gave it a try. I didn't actually look up how to do it...I kind of just assumed from what I had heard! This will work on a break in which the nail piece hasn't come off yet. Here's my break: 

Tea Bag Nail Repair

It doesn't look too bad in the picture, but it would have ripped up to my nail bed and the trimmed nail afterward would have looked funny! Even worse news? It's on my photographing hand! :( I took a tea bag and cut a piece off a little bigger than what I would need to cover the rip. I also dumped the contents of the bag out and saved the bag itself for another time. Though, I hope I don't have to do this again soon! I then polished my nail with base coat and I stuck the tea bag piece to my nail. I waited a minute or so for the polish to dry a little. Then, I used an orange stick to smooth the tea bag down as much as possible. I then used an angled nail clipper to trim off the excess bag: 

Broken Nail Repair

If I have to do this again, I would probably also use some nail glue to help the tea bag really adhere to my nail. Finally, I went over my entire nail with one more coat of base once the first coat was dry. Then, I went about polishing as usual! This probably only added five or so minutes to my normal mani routine, which is great! Also, I've been wearing the mani I polished over this for four days now and there's no sign of continued ripping in sight! It hasn't caught in my hair or anything! I just want my nail to grow out long enough so that I can trim the broken part off and cut my nail down without it looking silly. Hopefully this is helpful the next time you need to save a ripping nail! Enjoy! :)

How to Repair a Broken Nail

Saturday, November 17, 2012

Movember Mani

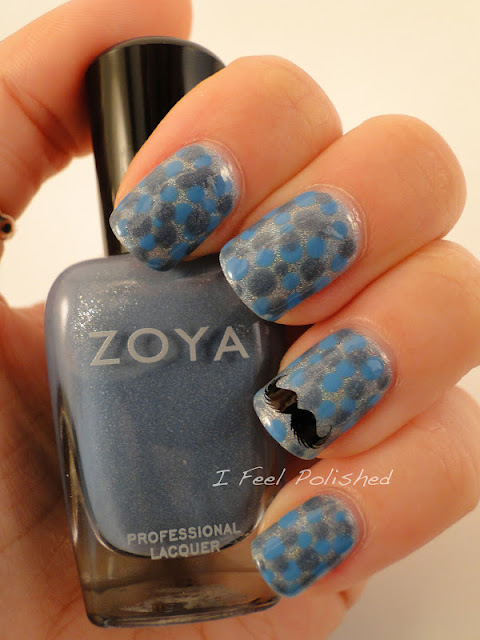
No Shave November and Movember are when men (and women!) forgo shaving to raise awareness for mens health issues, mainly prostate cancer. I wanted to dedicate a mani to Movember and some adorable moustache decals from RLR Creations were the perfect addition to my nails! I chose blue as my focus color since it's the same color as the ribbon for prostate cancer awareness. The base for this mani was Hits Poseidon, which is a gorgeous light blue holo! I then used Zoya Yummy and Zoya Skylar to make various dots over Poseidon. Finally, I added a moustache to my accent nail, finishing off my No Shave November nails! I even took a picture outside for you guys to show off the holo-awesomeness of Poseidon! Enjoy! :)

Movember Manicure

Movember Manicure


Mustache Nails

Moustache Nails

Thursday, November 15, 2012

Indie Spotlight: I've Been an Awful Good Girl

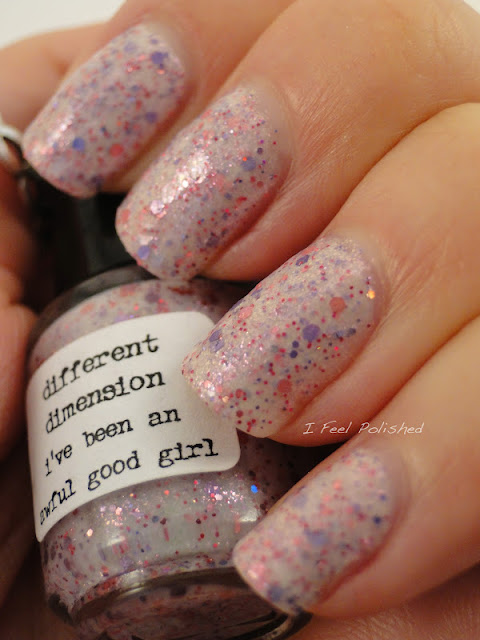
Today's Indie Spotlight features I've Been An Awful Good Girl by  -->Different Dimension -->. This polish is from her Santa Baby collection and it is BEAUTIFUL! It's so hard to capture in a photograph but this polish looks amazing, especially in the sunlight! I've Been An Awful Good Girl is a white based polish with a pinky shimmer. It also has pink and purple glitter in different sizes. This was three coats but you could definitely layer this over white and use less coats. If you haven't checked out these yet, you definitely should! Her entire Santa Baby collection is great and would be perfect for the holidays, or any time of the year! Enjoy! :)

Different Dimension I've Been an Awful Good Girl

Different Dimension I've Been an Awful Good Girl

Different Dimension I've Been an Awful Good Girl

Different Dimension I've Been an Awful Good Girl Macro

*This polish was sent for review. As always, all opinions are my own. 

Tuesday, November 13, 2012

Zoya Aurora and Storm

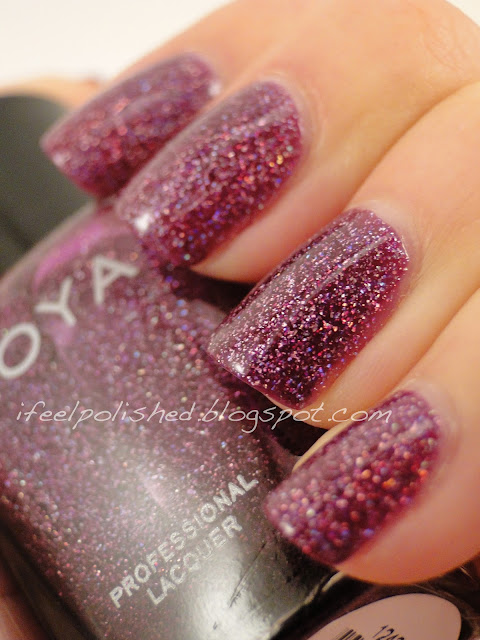
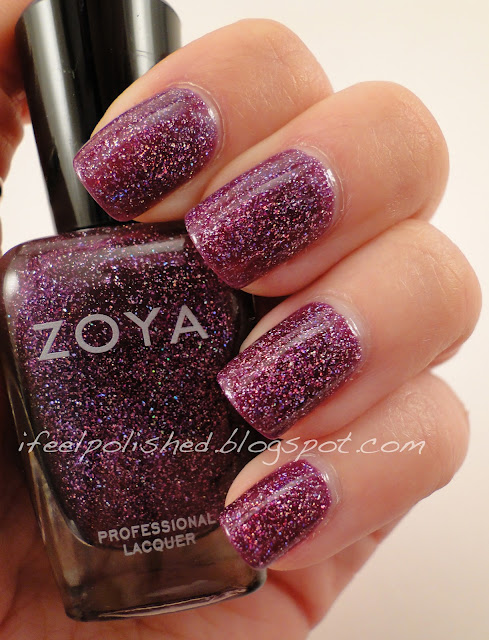
I know I've professed my love for Zoya before. However, their Ornate collection takes this love to a whole new level. These.polishes.are.gorgeous! Seriously, I even love Electra, which I was sure I wouldn't be crazy about. Even the husband said it looked, "cool," which is saying a lot! After swatching all of them on plastic swatch sticks, I knew I had to use all of them immediately. I began with Aurora and Storm, mainly because I'm saving Logan and Ziv for something special in December and I already used Blaze on my toes. :) I started with two coats of Aurora. Holy moly. I couldn't stop staring at my nails. Even in minimal lighting, they were beautiful. Aurora is a gorgeous purple polish with "micro-fine diamond" holographic glitter. See for yourself:  

Zoya Aurora

Zoya Aurora

Zoya Aurora

Zoya Aurora Macro

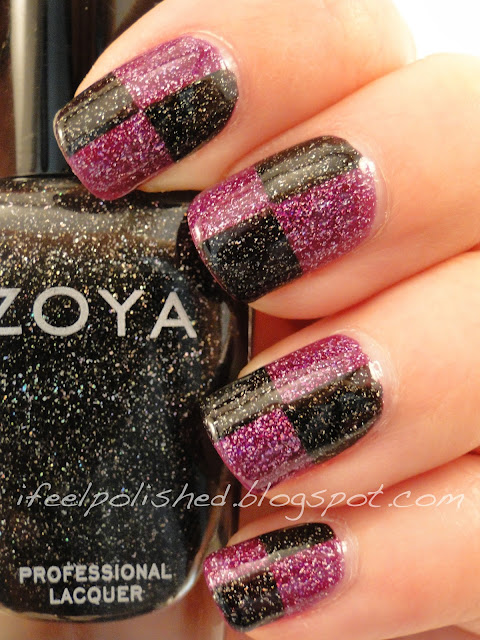
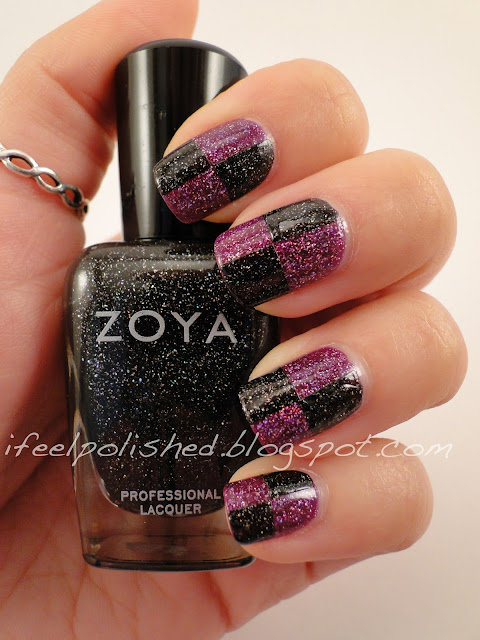
Then, using striping tape, I used Storm to create a checkboard pattern. I've been dying to do this full scale since my BCA nails a few weeks ago. Storm is just as gorgeous as Aurora and I am indeed blown away by these polishes! I can't wait to use the other ones! I want a back-up of all of these just because they are so amazing! They are smooth, opaque, and everything a polish should be! Enjoy! :)

Zoya Aurora Zoya Storm

Zoya Aurora Zoya Storm Checkerboard

Zoya Aurora Zoya Storm

Checkerboard Nails

*These polishes were sent for review. All opinions are my own.

Saturday, November 10, 2012

Happy Birthday, USMC!

Happy Birthday to the Marine Corp! Today, the Corp is 237 years old! Also, Sunday is Veterans Day and since my husband was a Marine, I had to do some nails dedicated to him and these two special days! The Marines were a huge part of our lives for many years and I'm so proud of his service, which included time in Iraq. He's my hero! :) 

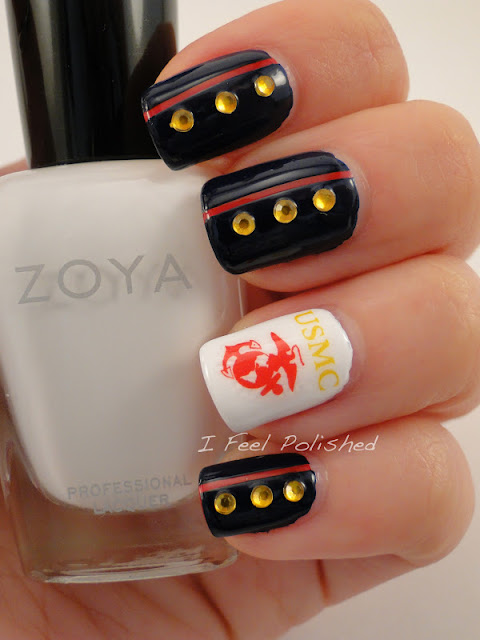
Marines wear amazing (and really attractive) Dress Blues. Those were my inspiration for these nails. My accent nail is white to represent the cover worn with Dress Blues. I also used a decal from RLR Creations. She makes awesome decals and worked with me to make sure I got exactly what I needed. This decal shows the Eagle, Globe, and Anchor symbol associated with the Marines. My other nails represent the coat worn as part of the  Dress Blues uniform. It's a very dark navy blue coat with red trim and gold buttons. I used Zoya Sooki for the red. I then used striping tape and polished over Sooki with China Glaze Calypso Blue. Finally, I polished my top coat on and placed some yellow rhinestones next to the red stripe. 

Happy Birthday, Marine Corp! Happy Veteran's Day to all of the Vets out there! 

Ooh-rah! Enjoy! :)

USMC Nails

USMC Nails

Marine Corp Birthday Nails

Veteran's Day Nails

Thursday, November 8, 2012

Indie Spotlight: Date at Midnight with Nosferatu

I've decided to begin posting on Thursdays now, in addition to Tuesdays and Saturdays. Thursdays will be dedicated to indie polish and I will continue to post until I run out of indies to show you (hahaha, yeah, right!) or until I burn myself out! :) I wanted to feature one indie per week because I feel like there are so many gorgeous polishes out there that deserve the spotlight! Hopefully you'll enjoy this addition to the blog! I'm really excited about it! 

First up is Date at Midnight with Nosferatu by Nostalgic Nail LacquerI just love the name of this brand! She also has awesome bottles, but that isn't even the best part about this indie polish! Nostalgic's polishes are amazing! And they are three free and most of them are cruelty free! Date at Midnight with Nosferatu went on smoothly and was gorgeous in three coats! I could have layered it over a grey polish, but I wanted to show it in all of its glory by itself! This polish is a grey cream with two different sizes and colors of hot pink glitter in it. It is simply beautiful and has so much depth! If you haven't checked  out yet, you definitely should! Enjoy! :)

Nostalgic Nail Lacquer Date at Midnight with Nosferatu

Nostalgic Nail Lacquer Date at Midnight with Nosferatu

Nostalgic Nail Lacquer Date at Midnight with Nosferatu

Nostalgic Nail Lacquer Date at Midnight with Nosferatu

*This polish was sent for review. As always, all opinions are my own. 

Tuesday, November 6, 2012

Indie Love: Iseult

One of my biggest concerns since my love for nail art developed is the professionalism of my nails. My students generally love my nails, but I want to be sure that I am projecting an air of professionalism when I'm meeting with parents. I'm sure they really don't think about my nails all that much, but I still worry. Therefore, Open House at the school required a more subdued mani. 

I've been wanting to use A England's Iseult for quite some time, and this seemed like the perfect occasion! Iseult is a very light pink with hints of silver shimmer. It was opaque in just two coats, which surprised me for a lighter color! Once it was dry, I stamped a simple silver flower onto each nail using OPI DS Radiance. Though the flower was really subtle, I loved the effect. Next time I'd consider a grey or black to allow the flower to be more visible. Finally, I added a little silver rhinestone to my accent nail flower and I was left with a simple, professional manicure! Enjoy! :)

A England Iseult

A England Iseult

A England Iseult

Saturday, November 3, 2012

Zoya Gilty is GORGEOUS!

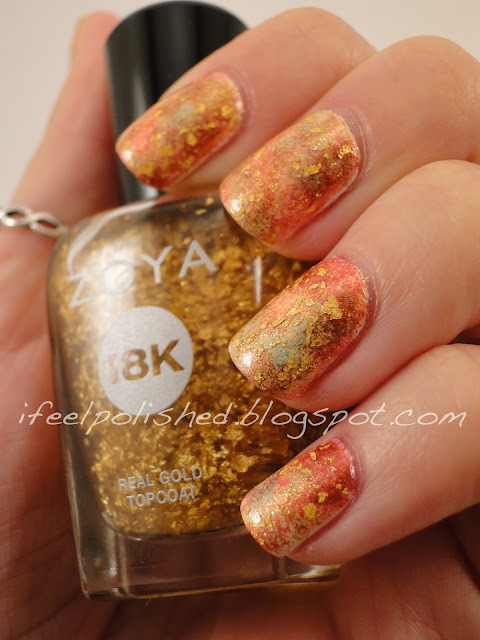
Ohmigosh, ohmigosh, ohmigosh, ohmigosh! I was never a huge fan of real goal topcoats UNTIL Zoya came out with one. I have a serious love affair with Zoya and I knew I HAD to have it. I used some Share the Love points to make Gilty affordable and a few weeks later, the Gilty trio was at my doorstep! Gilty is absolutely gorgeous and worth every penny!

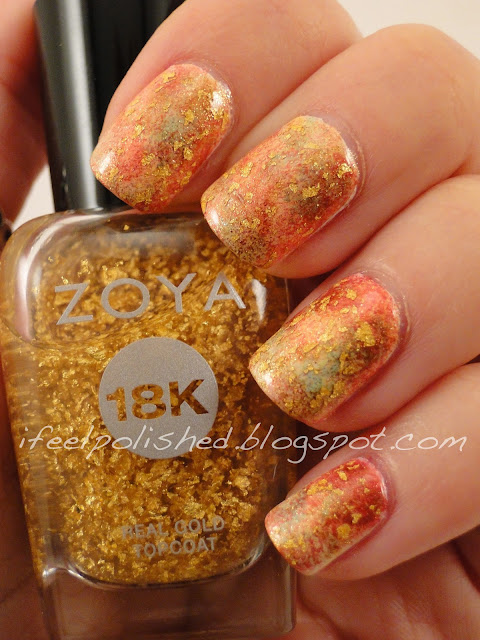
I knew I couldn't just put Gilty over black or white and call it a day. I decided to sponge fall colors over my nails first. I polished my nails with one coat of Zoya Purity to begin. Then, I ripped off tiny pieces of a make-up sponge. First, I used one sponge piece to sponge China Glaze Lemon Fizz all over the entire nail. I then sponged (using a new little sponge piece) Zoya Apple in a few places on my nail. I continued the random spot sponging with Zoya Tanzy, Zoya Kalmia, and China Glaze Harvest Moon until I was satisfied with the effect. This sounds like a lot of work, but it's really easy and turns out looking amazing! I used the same method when I did my Galaxy Nails back when I was just a little baby blogger. 

When the sponging was done, I added two coats of Gilty. Gilty is really easy to apply and she is in a shiny, clear base anyways so I didn't even need a top coat! YAY! I highly recommend adding a gold top coat to your collection if you can. Even if you aren't a fan of gold gold (which I'm not), it really does look awesome! Enjoy! :)

Zoya Gilty

Zoya Gilty


Fall Nails

Zoya Gilty Macro

Newer Posts Older Posts Home