Friday, June 29, 2012

4th of July Nails!

Fourth of July is my absolute favorite holiday! I love fireworks and spending time with my family and friends barbecuing and going out on the boat! Such a fun time! :) I knew I wanted to do some awesome nails, but there are so many ideas out there, it left my head spinning. I settled on my favorite type of nail art design...a gradient! I made it a little more unique by adding holographic stars. 

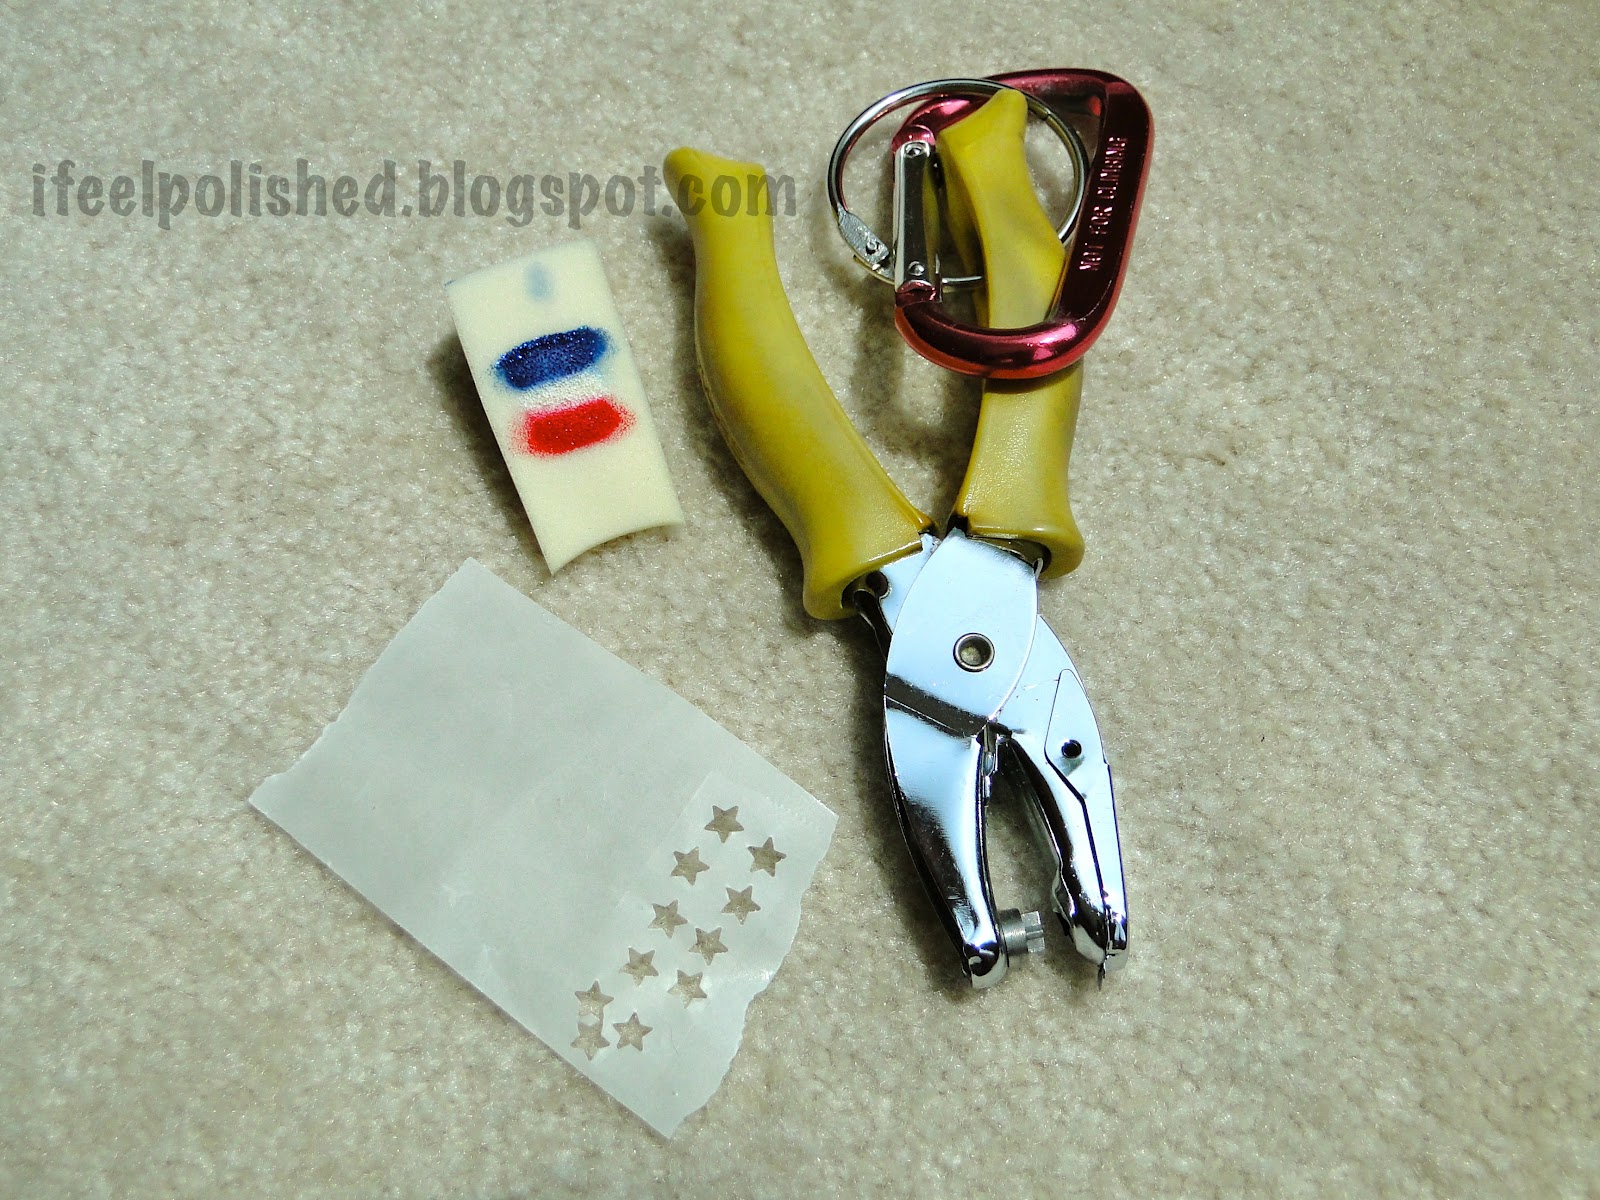
I started by polishing my accent nail with two coats of OPI DS Coronation. While I waited for that to dry completely, I polished my other nails with two coats of OPI Alpine Snow. When I was sure Coronation was completely dry, I used my star hole punch (yay, being a teacher!) to punch stars out of tape. I knew this might be difficult, so I stuck the tape to some sticker paper and then just punched the stars out. Then, I just peeled the tape stars off of the paper and stuck them to my nails! After that, I polished one coat of Alpine Snow on top because I was worried about how the gradient would look over Coronation.

Once Alpine Snow was dry, I got my sponge ready. I just polished Alpine Snow in the middle, Zoya Sooki on top, and OPI DS Magic on the bottom. Here were my tools and what the sponge looked like:


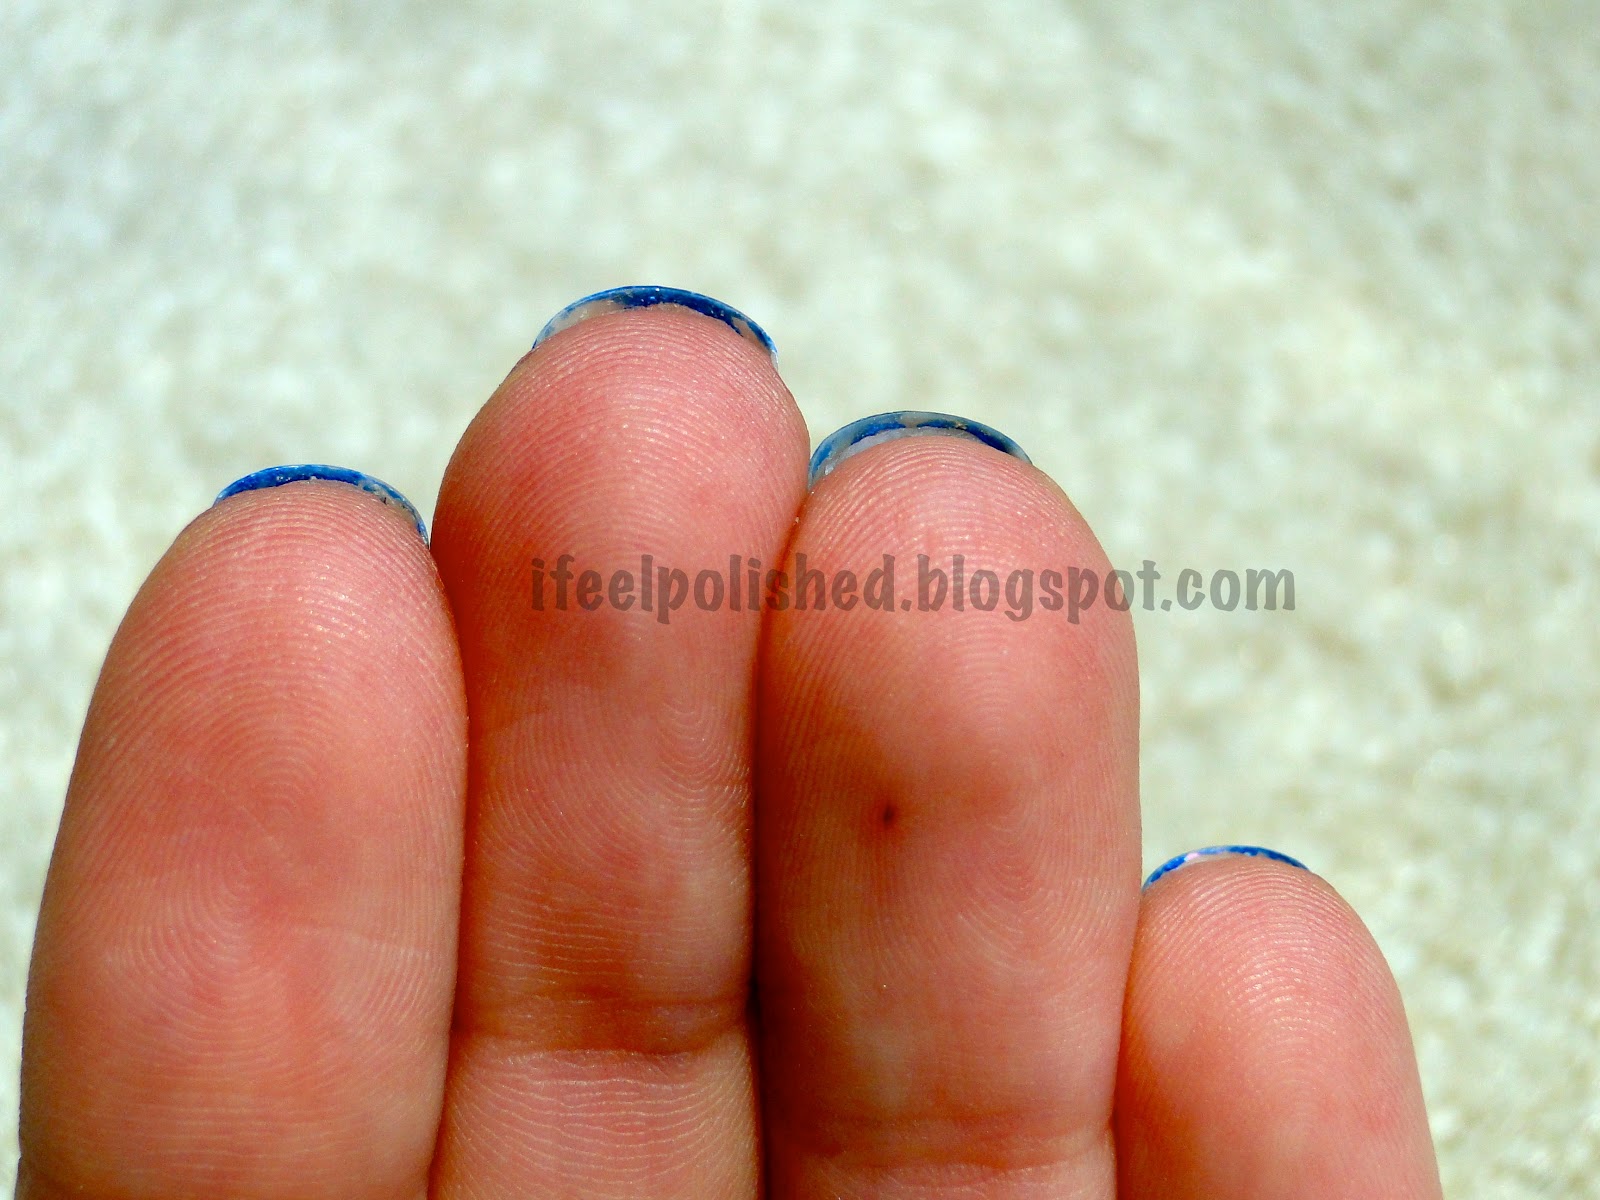
I sponged all of my nails. I did wrap my tips with Alpine Snow beforehand, but the Magic ended up wrapping them on its own! :) Once I polished my accent nail, I used tweezers to pull the star tape off. It ended up turning out pretty well, but I think I'll try to make star polish decals with the baggie method next time. I was worried the star punch would be too harsh with the fragile nail polish pieces though. They turned out really well! I love them! I did them early so I'd have time to post about them. I may end up doing them again before the 4th...if I get my Julep Maven order in time! ;) Anyways, onto the nails! These pictures were taken indoors on a sunny day! Oh, and don't forget to give me a "like" on ! Enjoy! :)

Fourth of July Nails

4th of July Nails

4th of July Nails

Fourth of July Mani

4th of July Mani

Nail Gradient How To

My wrapped tips, thanks to the sponge! :)


Wednesday, June 27, 2012

Polish Rack Update and Collection Organization!

In March, I posted a picture of my nail polish rack that my husband built. For more info on how to build your own, click here! I thought an update shot was needed since I've acquired a lot of polish in the past three months! My collection went from a modest 85 polishes, on the left, to a not-enough :) 171 polishes (including two that aren't pictured!), on the right. There are so many polishes on my rack now that I didn't even have a place to put my blog watermark! Geez! (Please don't steal my picture without giving me credit, hahaha!) 


The empty holes in the rack on the right are from polishes that are on the bottom shelf. That's where I put polish combination ideas I have for future manicures (and my mini bottles. How cute are they?!). Having said that, I wonder if anyone else is particular about the nail polish brands they use? I am crazy anal about the brands that I will allow into my collection. The bulk of my collection is Zoya (MY ABSOLUTE FAVORITE!!), OPI, and China Glaze. I have a few random polishes (Revlon, Layla, Ulta, Nubar, Essie, Julep) but it takes a pretty awesome polish for me to stray from my main three loves. Plus, I don't want to get into any super expensive brands because then I'll never eat again because my money will all go toward nail polish, hahaha! 

Having such a large (small in comparison to other bloggers!) collection makes traveling with it a difficult task! I think I'd need an entire suitcase to properly pack it all up and take it along! I recently saw another blogger who organized her collection using plastic salon nails. AWESOME IDEA. Plus, I don't have to wait to use a new polish! I get to swatch them right away without taking off my current polish. Here are the plastic nails I bought. They come in packs of 100 with two long bolts and nuts. I write the polish brand and name on the stick as well. Here is my entire collection! Enjoy! :)

Nail Polish Storage

Nail Polish Storage

Nail Polish Collection

Nail Polish Collection

Nail Polish Storage


Question: What's your favorite nail polish brand?

P.S. Don't forget to "like"  on Facebook! :)

Monday, June 25, 2012

Neon Zebra makes me LMFAO!

I don't know if I've mentioned this before, but I have a pretty awesome husband! Yesterday he surprised me with concert tickets to see LMFAO! I only wish I had known beforehand so I could have had a really cool manicure for the concert! However, there was PLENTY for me to look at there besides my nails, so I guess it's good they weren't amazing and distracting, hahaha! Let me tell you, an LMFAO concert is a crazy people watching experience! So much neon in one place, wow! Anyways, the band members and their dancers all had neon stripes painted down their arms with zebra stripes over the stripes. That inspired me to polish my nails in the same fashion! 

I even attempted to make a picture tutorial for you guys! Let me first start with why I almost never do picture tutorials. I get so into my nails and the design that I forget to take pictures throughout! It makes me so mad! So, I'll start by telling you that I forgot to take a picture of one step. Sorry! Also, let me tell you that Tropical Storm Debby is pummeling the crap out of us right now and my excitement over this manicure means that I didn't have the patience to wait for what could be a day or two for the sun to reappear. These pictures all had to be taken indoors without flash. One or two may be blurry. Oh well. Ok, onto the pictures! Enjoy! :)

Base coat: Essie Feed Me
Essie Feed Me

OPI Alpine Snow. A base of white helps neon polish to pop!
OPI Alpine Snow

One stripe (2 coats) of China Glaze Pink Voltage down the middle. When I do this manicure again, I'll make this stripe a little thinner!
China Glaze Pink Voltage

The left side of each nail had a stripe (3 coats) of China Glaze Towel Boy Toy. I started trying to clean up each nail with an orange stick right after each stripe, but it was proving to be VERY time consuming, so I stopped. Forgive any polish on my skin. It turned out to be a bear to clean up after the whole manicure was done and next time, I'll continue with my clean-up after each stripe. 
China Glaze Towel Boy Toy

And then I forgot to take a picture. On the right side of each nail, I polished a stripe (3 coats) of China Glaze Yellow Polka Dot Bikini. Sorry about forgetting the picture! But I did take an awesome shot of my the window that I usually take my photos in. Poor rainy window! Thanks, Tropical Storm Debby!

Next, I used OPI Black Onyx and my Shany plate (SH22). However, if you don't have this plate, the manicure could easily be done by using black polish and a toothpick. Just alternate between stripes on the left side and right side of your nail. 
SH22

Here are my stamping tools!
Shany stamping tools

And here's the finished product! I'm so excited and pleased with how my nails turned out! I'm sure LMFAO would be proud! ;) Hahaha! Enjoy! :)

P.S. Remember to "like" me on Facebook: ! Thanks!
Neon Zebra Stripes

Neon Zebra Stripes

Neon Zebra Stripes

LMFAO Manicure

LMFAO Neon Zebra Stripes

Saturday, June 23, 2012

Black and White Polka Dots

I put the "pro" in "procrastinate." Seriously. I'm pretty much awesome at it. I should be writing a paper that is worth 50% of my grade right now. It's due on Tuesday and I only have two pages done. Oh, and I haven't started the Powerpoint that goes with it. But hey, nails are MUCH more exciting, right?! 

That being said, onto the manicure! I took full advantage of the Mother's Day offer that Pampered Chef was giving away on Facebook at the beginning of May. It was $20 to spend at Bloom.com, which offers all kinds of beauty-related products. How they're affiliated with Pampered Chef, I'll never know. Anyways, since I'm a self-described obsessive Zoya lover, I used my $20 for some Zoya polish! Hey now, get off my back, I had already purchased a super cool, best Mother's Day gift EVER for my mom! ;) I chose some Zoya's from the Beach Collection. I don't know what is it, but lately I've been in LOVE with creme polish! I think summer played a part in this. One of the polishes I ordered was Reagan. She's a really beautiful cream magenta. She could seriously be opaque in one coat. Yep, a one coater. I did two coats because I'm still not comfortable with one coat. I always feel like it will come back to bite me in the butt somehow. 

Reagan can be a summer color, but after wearing her for nearly a week now, I think I've decided I'd wear her more in the fall or winter rather than the summer. Not that I really ever subscribe to the notion that polishes can only be worn during a certain time. I rock a neon pedicure nearly all winter! :) She just seems like a fall color to me. However, she turned out a little brighter in the pictures than she is in real life, so bear that in mind. After my two coats of Zoya Reagan, I also did two coats of Nubar Black Polka Dot and Nubar White Polka Dot. These are new additions to my collection and I LOVE THEM. The black consists a larger hexagonal and small circular black glitter. The glitter is not sparkly at all. The white consists of larger hexagonal and smaller circular white glitter that is more iridescent than sparkly. They are both awesome polishes that I would highly recommend. I did, however, have to fish around just a little bit for the larger glitter pieces. These pictures were taken indoors without flash on a sunny day! Enjoy! :)

Zoya Reagan Nubar White Polka Dot Black Polka Dot


Zoya Reagan Nubar White Polka Dot Black Polka Dot

Zoya Reagan

Zoya Reagan

Zoya Reagan

Question: What's your favorite creme polish?

Thursday, June 21, 2012

Poor Crackle...

So, I know a lot of people HATE crackle polish. Poor crackle, it must have just been overplayed when it first came out. I grabbed an OPI crackle when it first came out (silver shatter) and I'm not going to lie...I still love a good crackle. I have several in my collection. Yeah, yeah, yeah, I know. I don't wear it often, but the versatility, ease of use, and ability to hide wear helps crackle keep a special place in my heart. So, I recently wanted to use an untried crackle of mine, China Glaze Haute Metal. It's a pale shimmery pink and it only really looks good over white unless you do a really thick layer. And, if you layer it too thickly, it wrinkles, which happened on my middle finger. Boo. That being said, I started with my base white color, Zoya Gaia. She is GORGEOUS, my absolute favorite white polish! I love that she shimmers just a little bit. I actually have more pictures of Gaia than of the crackle, hahaha! She's just amazing in the sunlight! Then, I polished one coat of Haute Metal over the top of Gaia before finishing it up with my homemade holographic top coat. These pictures were taken indoors on a partly sunny day without flash. Enjoy! :)

Zoya Gaia

Zoya Gaia

Zoya Gaia

Zoya Gaia

Zoya Gaia

China Glaze Haute Metal

China Glaze Haute Metal

Tuesday, June 19, 2012

Color Changing Holo

I may have gotten a little overexcited by the holographic top coat that I made, so I promise, this will be the last time I post about it...for a little bit anyways! ;) Sorry, I'm just pretty much in love with it! The husband and I went to the Bahamas in February and I picked up two Del Sol polishes. If you aren't familiar with them, they change colors in the sun! Yep, I know, pretty awesome! This polish is called Calypso and it's pink indoors and purple in the sun. It's pretty on its own, but it really is beautiful when it's made holo! The formula is good on this nail polish, but it was prone to streaks and I did get a few tiny bubbles. They annoyed me but I'm sure no one noticed them in real life. The only problem I ran into when taking pictures was how to photograph both the indoor color AND the holo effect at the same time! The pink changes to purple REALLY quickly, so I had to work fast. Therefore, there are more outdoor pictures than indoor pictures! However, I'm happy to report that we finally got enough sun here in FL to properly photograph a holo polish! YAY! The purple pictures were taken outdoors in direct sunlight. The pink ones were taken indoors in direct sunlight. Enjoy! :)

Color Changing Polish

Color Changing Holographic Polish

Del Sol Calypso

Del Sol Calypso Del Sol Calypso

Del Sol Calypso

Del Sol Calypso

Monday, June 18, 2012

Sorry, I don't have a manicure for you guys today! :( I will likely have one tomorrow though! However, I'm pretty excited to finally have my Facebook page up and running! Feel free to go on over there using the link below and give me a "like"! Thanks! :)

Friday, June 15, 2012

Spectraflair Holographic Powder

*EDIT*
As of July 2012, the regulations on shipping Spectraflair have changed. You can no longer buy it in powder form. You can only buy in it in a base and several indie makers are selling it in high concentrations in a nail polish base coat. You can add drops of this to nail polish to make it holographic just like I did here with the powder. Visit Spectraflair's Store for purchasing info! 
*END EDIT*

In an effort to curb my need for holographic polish, I did a Google search for a holographic top coat. I figured, if I had a top coat, I could make any polish holographic! However, the search came back with holographic top coats like Fairy Dust by China Glaze, which has holographic glitter in it, but it isn't holographic in the sense that I wanted. Then, I noticed a YouTube video on how to make a holographic top coat. And that's when I discovered Spectraflair. It's a holographic powder that can be added to your polish to make it holographic! Seriously, I feel like I struck gold with this find! I watched a few videos on creating a holo polish with it and I read several blog posts. Here's what I learned:

1. It does not take a lot of holographic powder to make a polish holo. Add a little bit at a time.
2. Use a straw to put the powder into the bottle. Cut a little piece off the end to make it scoop-like. 
3. Wear a mask and glasses when working with the powder. It is a metal powder after all! It is perfectly safe, once it's in the polish.
4. You'll need some steel balls so that when the powder settles in the bottle, you can mix it up easily. 

After gleaning information online, I decided to give it a shot! Spectraflair comes in fine, medium, and coarse grade powder. This is definitely a fine powder, not a glitter! Judging from the pictures I found online, the coarse grade seemed to have the strongest linear holo effect. I ordered one gram of coarse grade Spectraflair holographic powder on eBay for $20. That seems a little steep, but the auction stated that it would make 5-6 bottles of holographic polish. Assuming you only got 5 bottles out of it, that's only $4 per bottle! When compared to holographic polish costs, that's an awesome deal! Plus, after having made one polish now, I can confidently say that I will get more than 6 bottles of polish out of my powder. So my powder traveled from CA to FL in record time (3 days!) and I was so excited to get it! It came in a baggie...look at that gorgeous holo effect just in the bag! 

Spectraflair

Spectraflair

A woman from one of the videos I watched online had her Spectraflair in a small pot, which seemed much easier for scooping powder out of than a baggie. So, I found a little pot of hand cream I wasn't using from a Birchbox I got a few months ago. I cleaned it out with hot water and soap and I dried it out completely. Then I put on my mask and glasses and dumped the powder into the pot. It definitely had a little bit of dust action, so the mask and glasses were a good idea. Here's my little pot of Spectraflair! I chose a blurry one so you could see the flecks of sparkle! 

Spectraflair

While I was buying my mask and glasses, I also bought some steel bb's made by a company called Daisy. They are zinc plated, which I read mostly good stuff about. (By the way, if you need some bb's, email me at and we can work out a very reasonable price! I have more than I'll ever need, hahaha!) 

I had an OPI top coat that I received for Christmas that I hadn't used yet, so I decided to holo-ify it. I used three teeny tiny scoops of Spectraflair and four bb's. Then, I got to shaking! It just takes the normal amount of shaking that any polish would. I tested out the holo effect on my nail and decided I wanted a little more, so I added one more tiny scoop, bringing the total to 4. I've read that you can definitely add too much, which diminishes the holo effect, so I didn't want to do that. I also read that you can turn a clear polish into a grey polish very quickly, and I definitely didn't want that! Here's what my polish ended up looking like! I LOVE IT!

Spectraflair Top Coat

For my first use of my new holo topcoat, I used Zoya Calypso. She's an awesome coral polish that was beautiful after two coats. I also wanted an accent nail, so I used China Glaze's Luxe and Lush. However, it ended up not really showing up well in the pictures and would probably look better over a darker polish.

I never realized how hard holographic polishes were to photograph! Man, they've been giving me a difficult time, especially since I'm combating the rainy season. I took so many pictures that I don't remember which ones I used flash on and which ones were taken indoors on a partly sunny day! I have used the polish a second time and I feel like I took better pictures with that, so once I have those uploaded, you'll get a better look at the top coat. The top coat isn't nearly as strong as Layla Hologram Effect, but it still looks great and I'm extremely happy about it! Enjoy! :) 

Zoya Calypso

Zoya Calypso

Zoya Calypso

Zoya Calypso

Zoya Calypso


Newer Posts Older Posts Home